Remove the Background using Select Color Range
Now the fun part begins. The goal here is to cleanly remove the green background leaving only the subjects. I'm a big believer in nondestructive editing. In this case, that means using a layer mask to remove the background. By using a layer mask, we don't need to ever change the pixels in the image, so we can don't run the risk of ruining the image by deleting too much. And, as you'll see in the chapter about refining the mask, there are techniques that only work on a mask.

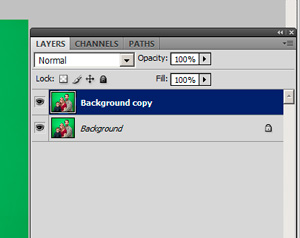
Load the image into Photoshop to get started. By default, the image will start out as a locked Background layer. But, the end result we want is to have just the subjects in front of a new background. That means we'll want them on a new layer above the background. The easiest way to get that is to duplicate the background layer by pressing Ctrl-J (Cmd-J on a Mac).
Now we can create a layer mask on the Background Copy layer to hide the green backdrop. In the end, we'll drop in a new Background to finish the image.
To create the mask, we'll first create a selection of just the subjects, and then use the Add Layer Mask command to turn that selection into a mask.

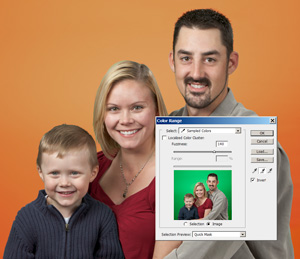
We'll create the selection using the Select Color Range command, which will open the dialog box shown here. To see the selected area, I've chosen the Quick Mask preview mode. I've also checked the Invert box to invert the selection. That way, the colors I choose will be masked out, and the remainder will be actually be the selected region.
Click on the right-most eyedropper tool and click on the image in the green area. To fill in the entire green area, click on the middle eyedropper and continue clicking in other areas of the background to add those colors to the selection.
The last step in this dialog box is to adjust the Fuzziness slider back and forth until you get a good selection where all of the background is masked, and all of the subject is visible.

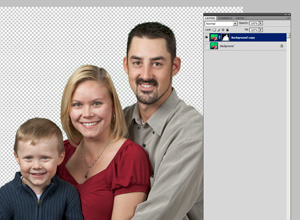
We now have a pretty good starting point. Be sure to turn off the Background layer visibility to inspect the result. The checkboard pattern is Photoshop's way of displaying a transparent area.
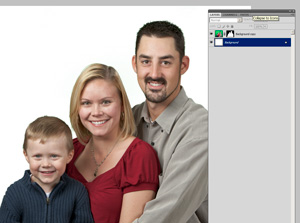
At this point, it's also useful to fill the background layer with a solid color so that you can better judge the edges of the mask. Make the Background layer active and select Edit - Fill from the menu, and choose White as the fill color.

You'll probably see some green fringe around the subjects. That's normal. The Select Color Range command is good, but it's not perfect. In the section on refining the mask we'll go over some techniques to perfect the result.
