Craig Stocks Arts Fine Art Photography and Artwork Duplication Services in Peoria and Central Illinois
April 6, 2016 Update
I have updated the script and styles to create simple centered mat within the frame. The script also has improvements to better handle horizontal and vertical images and to allow a border around the image insice the mat.
The frame script and style can be downloaded here <link>.
January 28, 2011
See the companion video tutorial on YouTube.
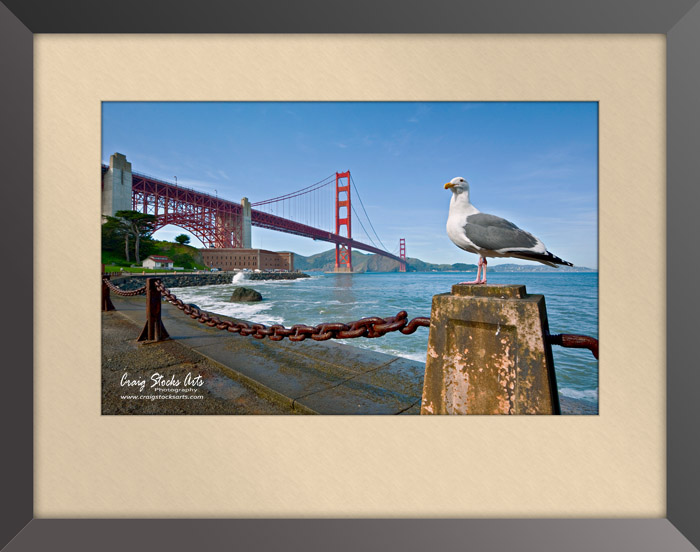
This is a follow-up to the earlier post showing how to preview your images framed and hanging on a wall. One of the more interesting aspects of that post was using Photoshop layer styles to create a digital frame and mat around the photo. I was further intrigued by a post on Photoshop User TV where RC Concepcion explained the concept of optically centering an image. He was inspired by a post by Russell Cottrell where Russell explained the math behind the process. His web site also includes a calculator that will do the math for you, and gives you a visual representation of the mat as well.
I decided it was a good opportunity to combine the two ideas, and implement it into a Photoshop script that allows you to specify some of the settings. In the previous tutorial, I used an action to record the steps, but that fixes the size of the image and the mat, and I don't always want the same sizes. The solution is to translate the action into a Photoshop script that allows me to introduce prompts, variables and calculations into the process.
Along the way, I also discovered a hidden "gotcha" in layer styles. It turns out that saved layer styles are resolution dependent. In my case, I created the layer styles for the 100 pixel frame using an image at 90 PPI. The actual pixel dimensions of the image don't matter. If the image is set to 90 PPI, the frame will be 100 pixels. But, if you apply the saved 100 pixel frame style to an image that's set to 360 PPI, the frame will be 400 pixels wide! But don't worry, the script takes care of making sure you get the right size frame.
I particularly like the idea of an optically centered print, maybe because I was taught some time ago that a "professionally" mounted photo will be positioned so that mat is slightly larger at the bottom. One difference though is that I like the top, left and right margins to be equal, so that only the bottom is larger. The math is the same as Russell outlined, but in my case, I'm setting the margin size for the left, right and top, and then solving for the correct size of the mat. In practice, the wider the mat, the more obvious the effect will be.
I've recorded a video tutorial that shows the script in action. It also explains how to download and install the two files you'll need, but I'll also include the details here.
First, you need to download these two files. Simply right-click on the link below and choose "Save target as...." and save the file somewhere you can find it, such as onto your desktop.
Optically Centered Frame.jsx is the Photoshop script written in Javascript.
Frame Styles.asl is a set of two layer styles. There is one layer style for the frame and mat, and a second for the cutout around the image.
Once the files have been downloaded, they need to be copied to the correct location for Photoshop to use them.
First, the script file needs to be copied to a location where Photoshop can find it. Select the file Optically Centered Frame.jsx and copy it to the Photoshop script folder. Using CS5 in Windows, that would be C:\Program Files\Adobe\Adobe Photoshop CS5\Presets\Scripts. On a Mac, that would be Applications>Photoshop CS5> Presets> Scripts. (I don't have access to a Mac to confirm that this is correct.) Now, start (or re-start) Photoshop.
Next, we need to load the layer styles. Open the Preset Manager (Edit / Preset Manager...). For the Preset Type, select Styles. Then click on Load... and find the Frame Styles.asl file in the location where you saved it when it was downloaded.
That's it. Now, simply open an image. Select File / Scripts and you should see Optically Centered Frame as one of the options. Once it's launched, you will be prompted to enter three values:
Image Size - This is the long dimension, in pixels, that you want for the finished image. This is just the image size and does not include the frame or mat. The default is 2000 pixels, but you can enter any size you want.
Mat Width - This is the width the mat will extend on the left, right and top, and does not include the frame. The default is 175 pixels.
Frame Thickness - This is the width of the frame. The default is 100 pixels, but again, enter any dimension you want. If you enter a zero, the script will not apply the layer styles for a frame or the mat. If you want the mat, but not a frame, then keep the default value for the frame thickness and simply turn off the appropriate layer effects that make up the frame (Inner Glow, Bevel and Emboss and Stroke).
The script does several things. First, it duplicates your image so it's working on a copy, not the original. It then flattens the image and converts it to sRGB (if necessary) so that it can easily be saved as a jpeg. It then resizes the image, expands the canvas appropriately and adds a blank, white layer at the bottom of the stack. Lastly, it applies the two layer styles contained in the Frame Styles.asl file, one set of layer effects for each layer.
The beauty of using layer styles is that you can continue to edit the styles. For instance, you may want to change the color of the mat. If you find that you always want something different, you can save the layer style and then delete the original from the Styles panel. It's important to keep the same name for the style, "100 Pixel Frame" or "Mat Bevel in image" so that the script is able to apply the correct style. The next time you run the script, it will apply the new copy of the style. One note of caution about changing the layer styles - be sure that you're using an image at 90 PPI so that the styles retain the correct scaling. If you're using the default sizes, you'll already be at 90 PPI.
That's all there is to it.